
Section 5 - Prepare the pull request
A pull request is the review page for your branch. It is where GitHub runs checks and where reviewers approve, request changes, or leave comments.
You do not need to memorize the Git commands. After the local preview looks right, ask Codex to package the change for review.
For more detail about what happens after you push, how to read passing or failing checks, and who reviews what, see Guide ownership and workflow and Automated checks and review signals.
Ask Codex to push the change
Section titled “Ask Codex to push the change”Use this prompt:
The local preview looks good. Please prepare this change for review.
First show me the files that changed and summarize the change in plain English.Run the appropriate checks for this service_docs change.If the checks pass, commit the change and push this branch to origin.Then prepare a pull-request title and body using the repo's PR template.Do not create the pull request until I approve the title and body.
Codex may ask for permission before it pushes the branch. Not every user will see this prompt.
If you see a prompt to push the committed documentation branch to origin: Confirm that the command begins with git push -u origin and names your working branch, not main. Then select Allow once. This publishes the working branch to GitHub; it does not merge the branch into main or create the pull request.
Push branch permission example
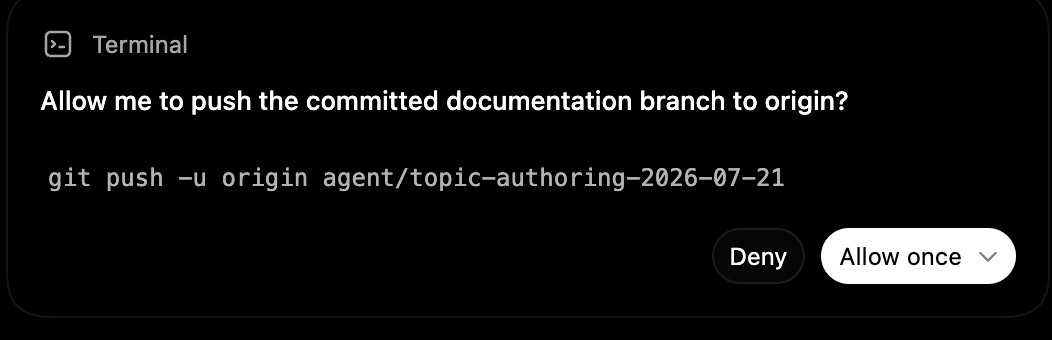
If the command names main or is otherwise different from the expected command, select Deny and ask Codex to explain why it needs that command.
Before approving the commit or pull request, quickly check that:
- the file list only includes files you expected
- the summary matches the change you asked for
- checks passed, or Codex explained what failed and fixed it
- the pull-request title and body are accurate
- any troubleshooting logic change is described clearly
Open the pull request in GitHub
Section titled “Open the pull request in GitHub”After Codex pushes the branch, open GitHub and create the pull request.
-
Open ZiplineTeam/service_docs in your browser.
-
Look for the banner that says your branch had recent pushes.
-
Click the green Compare & pull request button.
-
If you do not see that button, ask Codex:
Please give me the GitHub compare link for my current branch against main.Do not create the pull request. -
On the GitHub compare page, confirm that the base branch is
mainand the compare branch is your branch. -
Add the pull-request title and body.
If Codex already gave you an approved title and body, copy them from the Codex chat and paste them into GitHub.
If you do not have the title and body yet, paste a screenshot of the GitHub pull-request title and body fields into Codex and ask:
Please write a clear pull-request title and body for this service_docs change.Use the pull-request template shown in this screenshot.Return the title as one line and the body as one Markdown code block.Copy the title from Codex into the GitHub title field. Then copy the Markdown body from Codex and replace the GitHub pull-request body with it.
-
Click Create pull request.
New guide: assign the PR to the FSE
Section titled “New guide: assign the PR to the FSE”Always open Technical Contacts by System to find the relevant FSE. In the PR’s right sidebar, click Assignees and select that person. PRs are not automatically assigned; the initiator makes this assignment manually.
The FSE reviews and revises the draft on the same PR branch, completes the troubleshooting and service and maintenance guidance, and coordinates additional technical input. The FSE completes the Guide content checklist and PR readiness checklist, then moves the PR to Waiting for TW Review.
The FSE takes the PR through the existing TW/SE2 review process and completes the merge. Creating the initial draft does not make the initiator responsible for completing every part of the guide. FSE assignment adds no separate approval requirement.
Existing guide: prepare for human review
Section titled “Existing guide: prepare for human review”Assign yourself manually in Assignees.
Complete the PR readiness checklist, then follow the review path for your role on Guide ownership and workflow. You remain responsible for requested updates and merge.
For both workflows, required approvals remain TW/SE2. See PR workflow for labels and handoffs, and Auto-merge PR for merging instructions.