

Section 1 - Set up your workspace
Use the information on this page to get your computer ready for authoring topics.
Prerequisites
Section titled “Prerequisites”You need a Zipline GitHub account and write access to ZiplineTeam/service_docs.
I have a Zipline GitHub account but I need write access
Post a message in #AskIT asking for write access to ZiplineTeam/service_docs and include your Zipline GitHub username.
I need a Zipline GitHub account and I also need write access
Post a message in #AskIT asking for a Zipline GitHub account and write access to ZiplineTeam/service_docs.
Set Up Your Workspace
Section titled “Set Up Your Workspace”-
Install Git and Node.js LTS: Windows setup or Mac setup.
-
Install Visual Studio Code (VS Code).
Steps
- Download Visual Studio Code from the official VS Code download page.
- Choose the installer for your operating system.
- On Windows, select these installer options when they appear:
- Add “Open with Code” action
- Add to PATH
- Register Code as an editor for supported file types
- Open VS Code after installation.
-
Install the VS Code Codex extension.
Steps
-
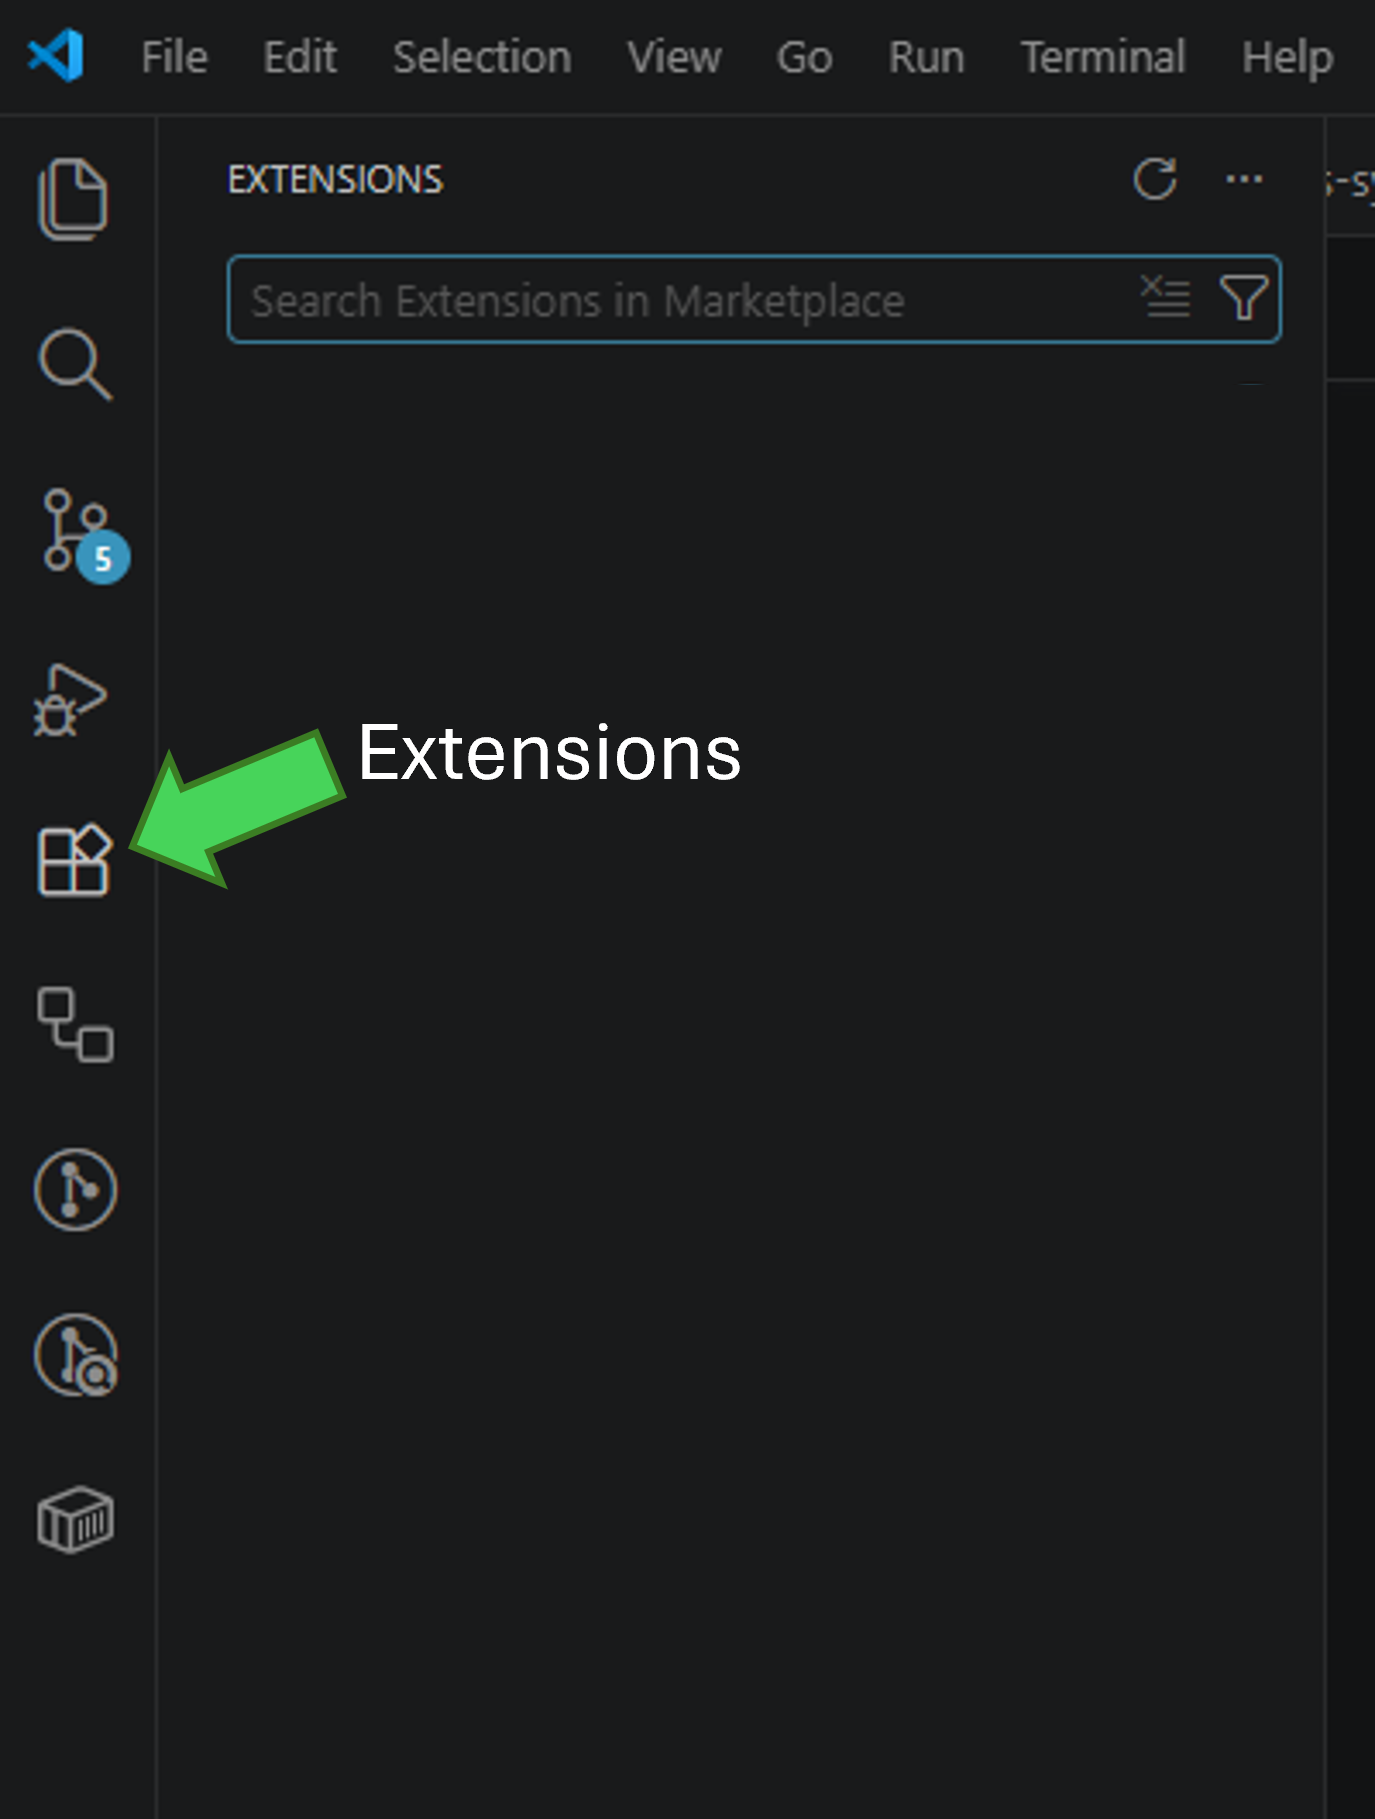
In VS Code, open the Extensions view.
Extensions view example
-
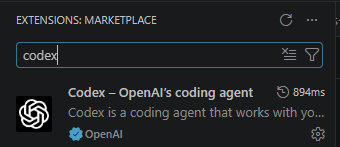
Search for
Codex.Codex search example
-
Install the Codex extension from OpenAI.
-
Sign in when the extension asks you to.
-
Open the Codex chat panel.
- Press Ctrl+Shift+P to open the Command Palette.
- Type
Codex: Open Codex Sidebar. - Select Codex: Open Codex Sidebar.
You can also use OpenAI’s Codex IDE extension setup page.
-
-
Sign in to GitHub in VS Code.
Steps
- In VS Code, open the Accounts menu.
- Choose Sign in with GitHub.
- Authorize VS Code in the browser when prompted.
This helps VS Code connect your local repo work to your GitHub account.
-
Clone the repo in VS Code.
Steps
-
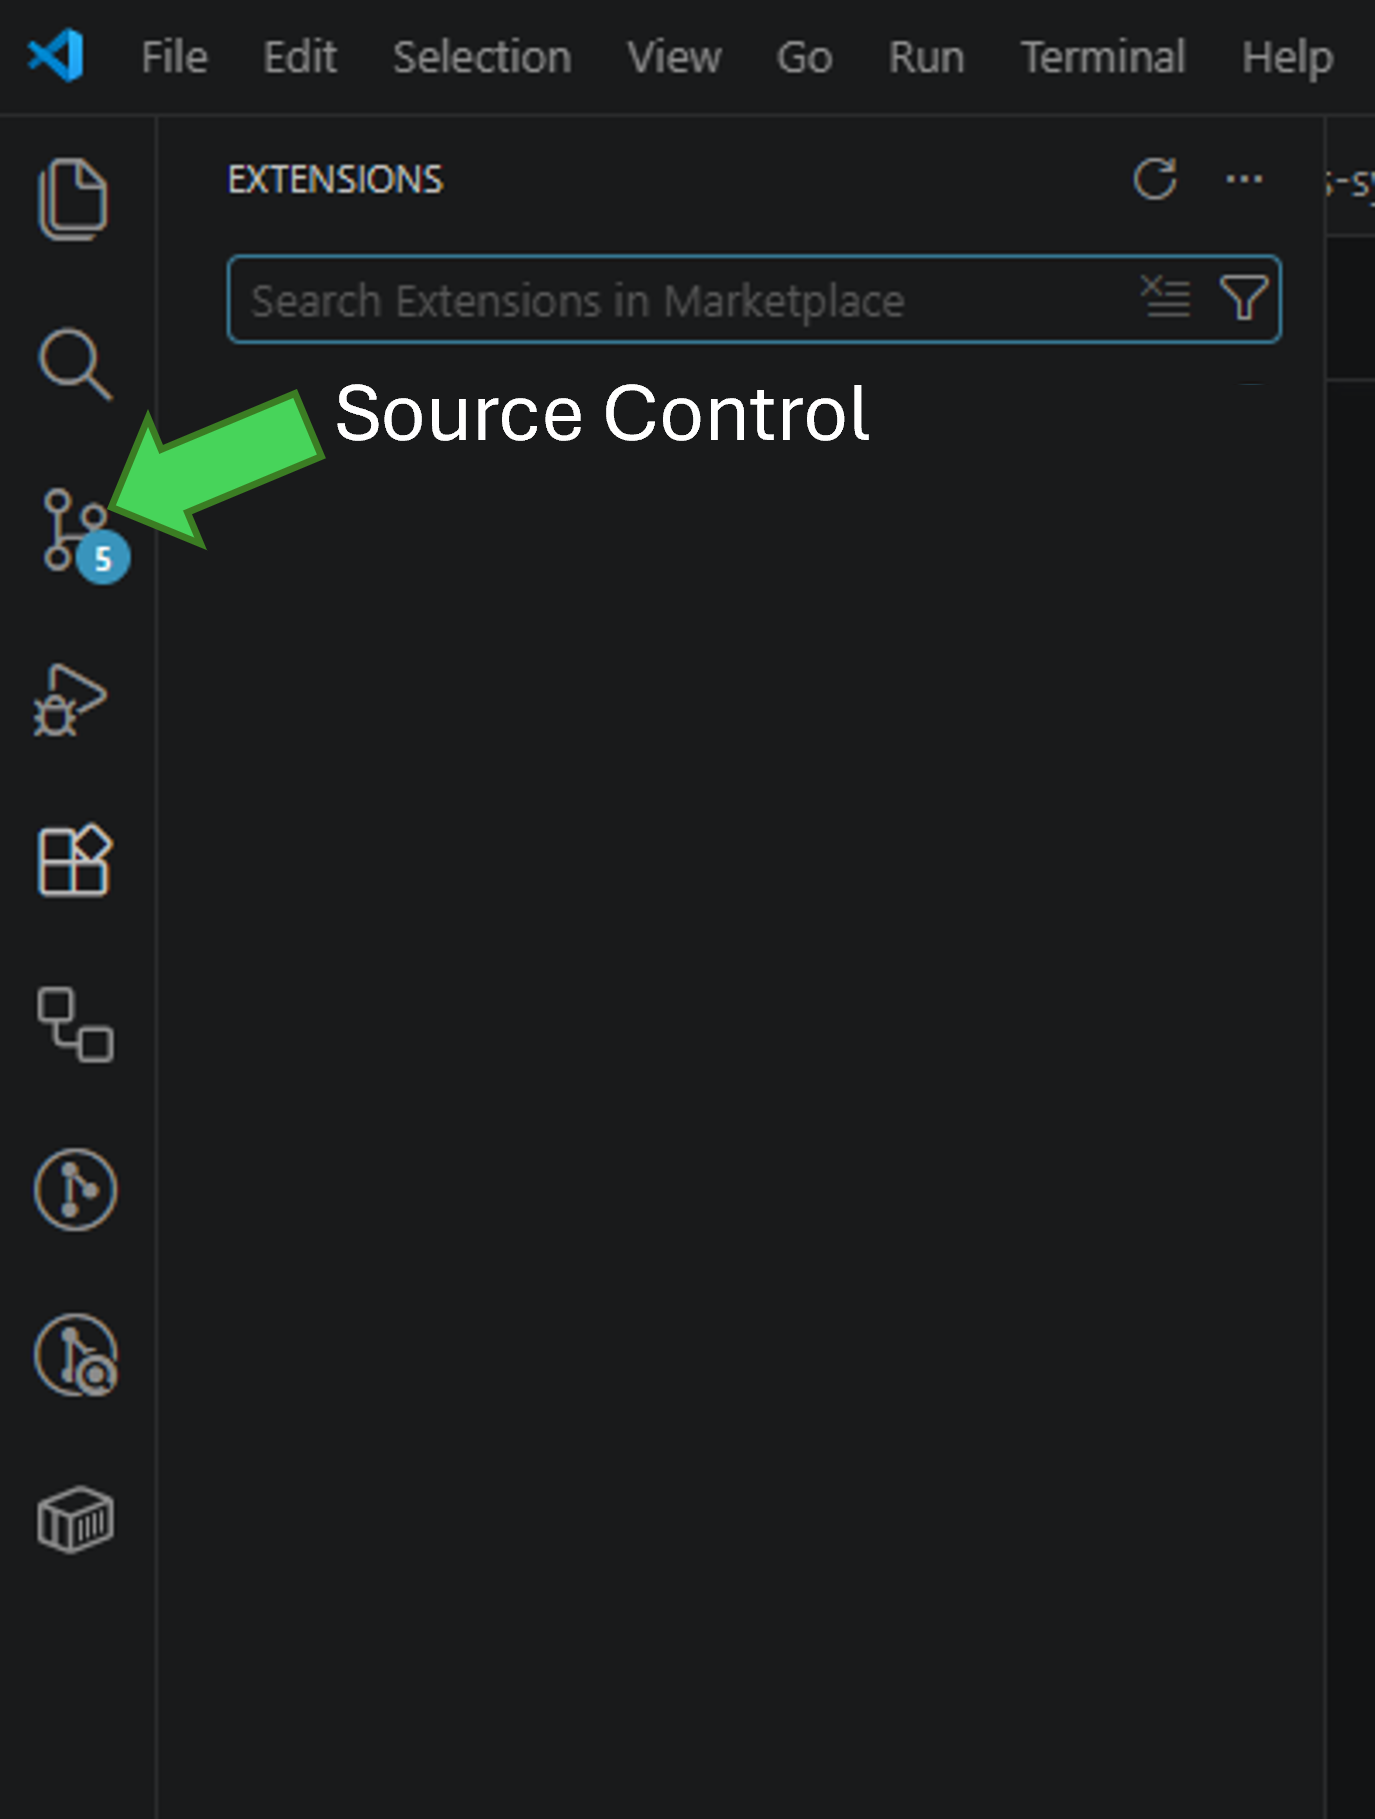
Open the Source Control view.
Source Control view example
-
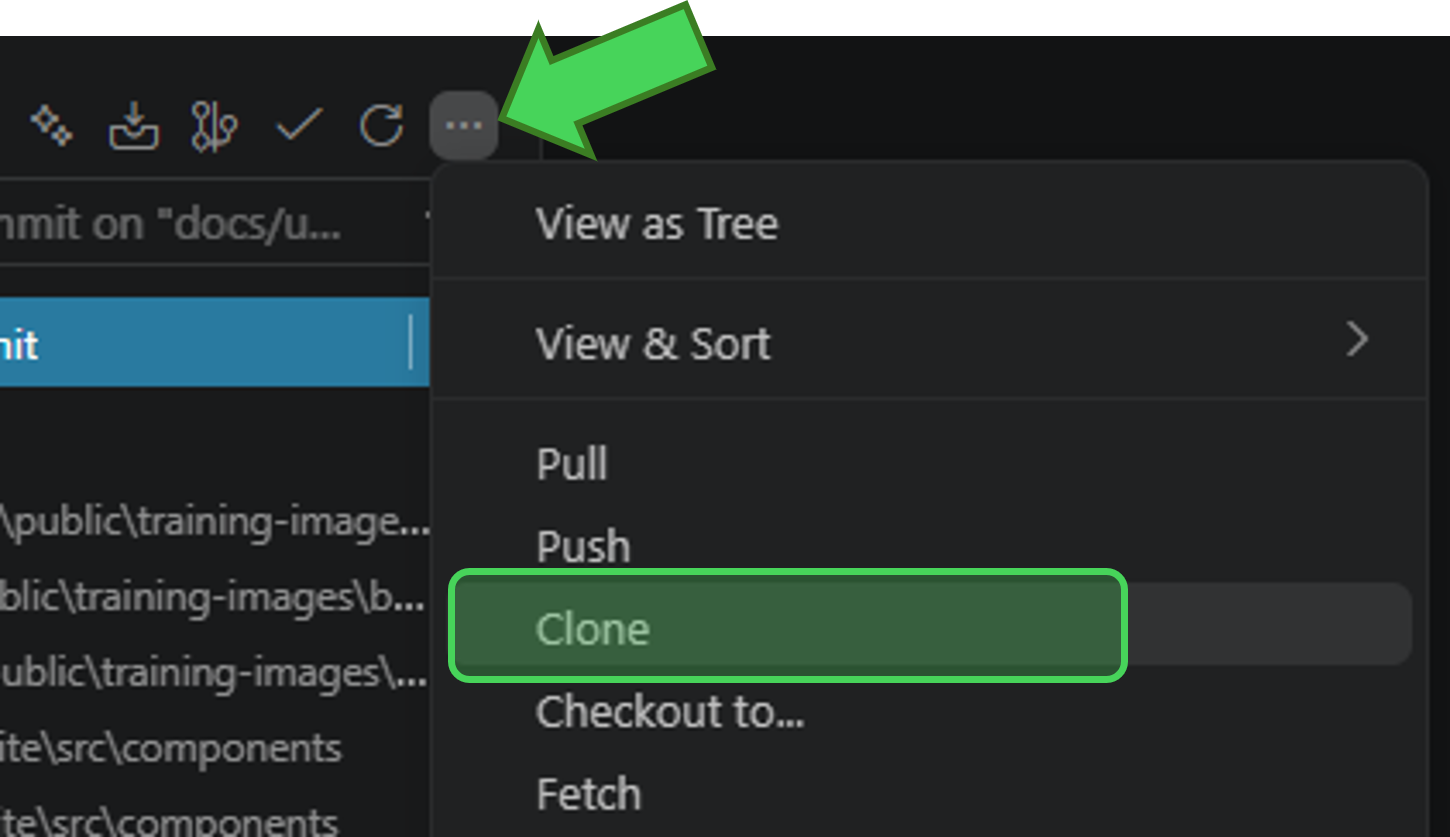
In the Source Control view, click the three dots, then select Clone.
Clone option example
-
Paste
https://github.com/ZiplineTeam/service_docs.git. -
Choose a local folder, such as
C:\GitHubon Windows. -
Open the cloned
service_docsfolder when VS Code asks. -
If cloning fails with a permission error, confirm that you are signed in to the right GitHub account and request access in
#AskIT.
-
-
Install site dependencies.
Steps
- In VS Code, open a terminal with Terminal > New Terminal.
- Confirm the terminal prompt is in the main
service_docsfolder. - Run
npm ci --prefix sitefrom theservice_docsfolder. - Wait until the command finishes and the terminal shows a new prompt.
- If the terminal says
npmis not recognized, Node.js is not installed correctly. Use Windows setup or Mac setup to install Node.js LTS, then try again.
-
Ask Codex to confirm the setup.
Paste this into the Codex chat panel:
Please check that this service_docs workspace is ready for authoring.Confirm the current git branch, whether the working tree is clean, whether site dependencies are installed, and how I can start the local preview.Do not edit files yet.
When Codex confirms the basics, continue to Start the local preview.